
Video Editing in Studio
Basic Video Editing in Studio
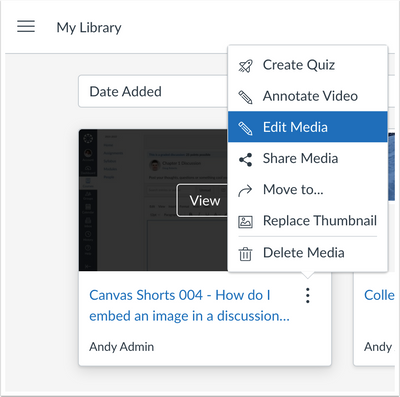
Basic cut and trim video editing options are available for Studio media.
View this tutorial to leaner how easy it is to do some basic video editing.
Advanced Video Editing in Studio
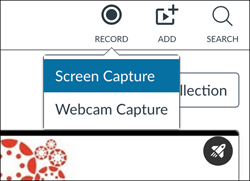
Studio aslo allows you to do some advanced video editing through the Record - Screen Capture tool. This tool is essentially ScreenPal, and there are a variety of editing tools within it. To access these tools, you will need to do a recording within Studio. Open Studio from the Global Navigation or within your Course Navigation. In the upper right corner of the screen click on the Record button, and select Screen Capture.
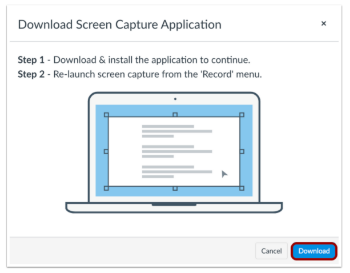
If this is your first time, you will be prompted to download and install the screen capture application.
After installing the screen capture application, record your screen capture video.
Learn how to record screen capture videos.
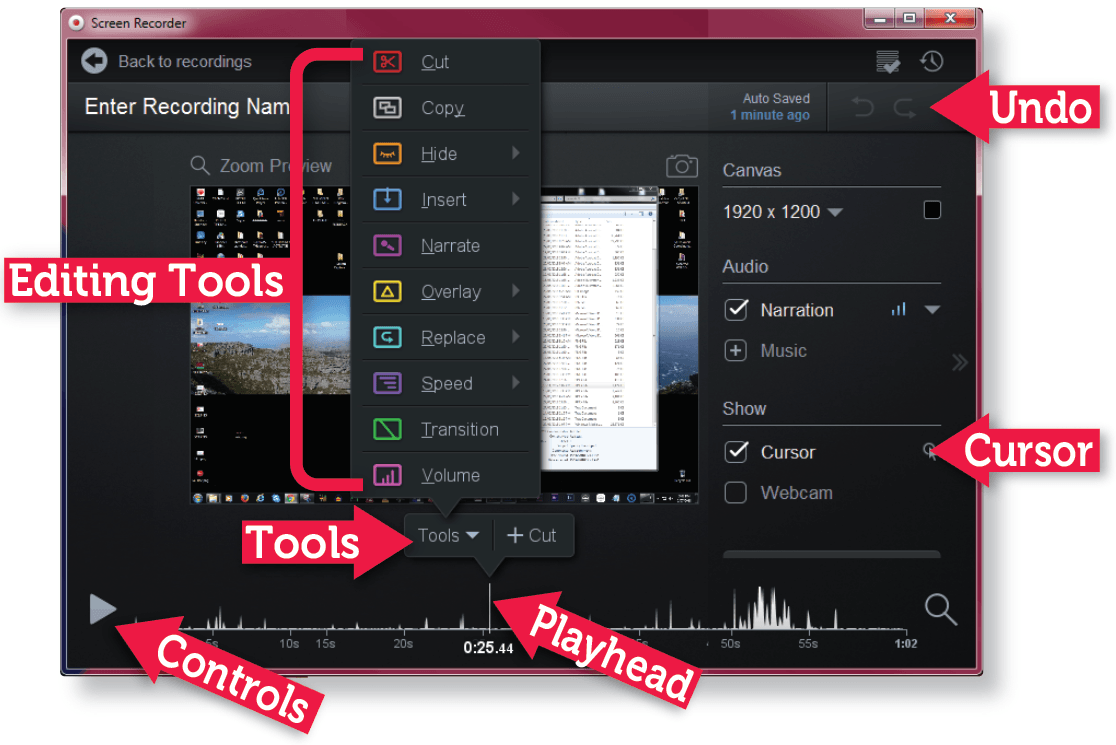
When finished, click Pause, then Done. Click Edit to access the editing tools.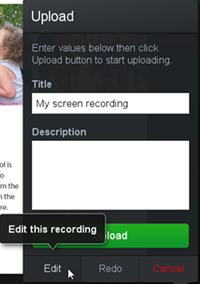
Here's a screenshot of the editing interface:
To apply edits and attributes to your video, view a 35 min. tutorial by Wanda Butterly "Video Editing in Canvas Studio" or you can view individual tutorials of each editing tool below:
Overlays onto video:
- Cursor Highlighting
- Zoom in and out of Timeline
- Add Blur
- Add Text
- Add Arrow
- Add Highlight to screen area
- Add a Shape (arrows, circles, squares, etc.)
- Animate Overlays (example: arrow moving around the screen)
Audio:
- Edit Audio
- Adjust the Volume (also helps to silence audio disruptions)
- Find and Fix Silence in Narration
- Add Music Track
- Add Narration
Video
- How to Cut
- Import and insert a video file
- Add Transitions (fades, swipes, etc.)
- Add an image