
Merging Sections in Canvas
Instructors teaching more than one section of the same course have the option to merge their sections in Canvas. Some instructors find merging saves time, as it allows you to have one Canvas shell to update, with students in each course section.
However, if instructors choose to merge sections on Canvas that are not officially cross-listed at the college, they must take many extra steps to comply with FERPA (privacy policies).
- Within Canvas, the process of merging sections is called “cross-listing." Keep in mind that “cross-listing” in Canvas is not the same as what LPC refers to as “cross-listed courses."
- Cross-listing in Canvas must be done before adding content and before students submit work. If you cross-list sections after the semester has begun and students have completed coursework, you risk losing course content and student work.
- Instructors who merge sections must take extra steps to align with FERPA policies:
- If you merge sections that are officially cross-listed by LPC - that is, your students regularly meet in the same location at the same time - it is typically OK for your students to similarly interact with each other on Canvas.
- If you merge sections that are NOT officially cross-listed by LPC, interaction between students in different sections must be limited to comply with FERPA laws. You MUST take extra steps before and throughout the term to maintain separation. (See Making Courses FERPA-Compliant below.)
- If you teach identical classes at LPC and Chabot, do not merge those classes.
- If you are teaching a HyFlex class, the DE Committee recommends that you do not merge that class with another section in Canvas. There are issues, such as attendance accounting, that are affected by merging.
Tutorials
Follow the detailed steps outlined below to merge two or more sections on Canvas.
To cross-list two sections on Canvas, follow the instructions below:
- From your Dashboard, find the course number for the main section by hovering over it and looking at the BOTTOM of your browser window. Note the number.
This is not the CRN of your course; it's the Canvas course number.

- Open the course that you want to move into the main section.

- Click Settings.

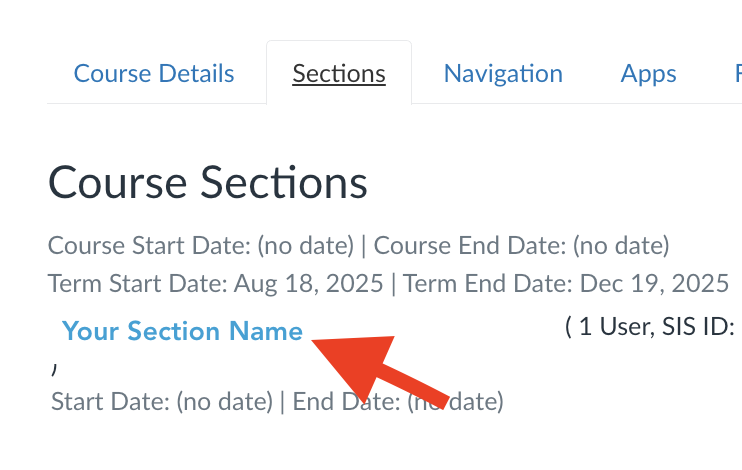
- Click the Sections tab.

- You'll see your section hyperlinked. Click on the name of your section.
- Click the Cross-List this Section button.

- You can either search for the course or type in the course ID (found in step 1).

- Click in the white space next to where you entered the course ID, and you will see that section automatically come up. Then click the Cross-List this Section button.

- To verify the process worked, click on People in your course navigation menu. You will notice that there are students from both sections. You, as the instructor,
are enrolled in both sections.

- Change the name of the merged course by going to Settings, then Course Details. In the text boxes next to Name and Course Code, type a name that reflects both sections (ex: ENGL C1000 A1 and A2).

- Scroll down to the bottom, and click Update Course Details.

- To see the newly merged course, go back to your Dashboard. You might have to reload
the page.

f you are ready to proceed with cross-listing more than 2 sections on Canvas, follow the instructions below:
- From your Dashboard, find the course number for the main section by hovering over it and looking at the BOTTOM of your browser window. Note the number.
This is not the CRN of your course; it's the Canvas course number.
- Open the course that you want to move into the main section.
- Click Settings.
- Click the Sections tab.
- You'll see your section hyperlinked. Click on the name of your section.
- Click the Cross-List this Section button.
- You can either search for the course or type in the course ID (found in step 1).
- Click in the white space next to where you entered the course ID, and you will see that section automatically come up. Then click the Cross-List this Section button.
- Go back to your Canvas Dashboard and open the next course that you want to move into the main section.
- Click Settings.
- Click the Sections tab.
- You'll see your section hyperlinked. Click on the name of your section.
- Click the Cross-List this Section button.
- You can either search for your main course or type in the course ID (found in step 1).
- Click in the white space next to where you entered the course ID, and you will see that section automatically come up. Then click the Cross-List this Section button.
- Repeat if needed for any additional sections.
- To verify the process worked, click on People in your course navigation menu. You will notice that there are students from all sections. You, as the instructor,
are enrolled in all sections.
- Change the name of the merged course by going to Settings, then Course Details. In the text boxes next to Name and Course Code, type a name that reflects all merged sections (ex: ENGL C1000 A1, A2, and A3).
- Scroll down to the bottom, and click Update Course Details.
- To see the newly merged course, go back to your Dashboard. You might have to reload
the page.
Making Courses FERPA-Compliant
Students have federally protected privacy rights. Instructors who cross-list sections on Canvas must take extra steps to make their merged classes FERPA-compliant. If you are not teaching officially cross-listed LPC courses, follow the instructions below after merging sections:
- In your course, click Settings > Course Details > More options, and make sure that:
- Let students create discussion topics is NOT checked.
- Let students organize their own groups is NOT checked.
- Hide sections on the People page from students IS checked.
- Disable comments on announcements IS checked.
- Click the "Update Course Details" button at the bottom to save any changes.
- Disable course navigation items that could allow students to interact with those not in their section. In your
course, click Settings and then the Navigation tab. Be sure to disable:
- Chat
- Conferences
- Collaboration
- When using the Canvas Inbox for sending a message to two or more students in different sections, check "Send an individual message to each recipient." (This works similar to "BCC" in our Outlook email.)
- For Canvas Discussions, keep your sections separate by either:
- Using group discussions, making sure to check the box next to "Require group members to be in the same section."
- Or duplicate your discussion and assign each copy to a unique section only.
- For Peer Review assignments, you will have to either:
- Manually assign students to review other students in their section only
- Or duplicate your peer review assignment and assign each copy to a unique section only.
- If you are using Canvas Studio and want to allow Comments on a video, post the video assignment separately for each section.
- When using Zoom for merged synchronous online courses, you will typically want to avoid using the
TechConnect Zoom course navigation integration to set up your meetings, as these links
and any correlating recordings would become visible to students across sections.
Instead:
- Make sure the class meeting links are only shared with students in their respective sections through an announcement, page, or assignment assigned to the appropriate section.
- If you are recording the meetings, only share recordings with students in their respective section through an announcement, page, or assignment assigned to the appropriate section.
- If you use any third-party publisher materials or other instructional technologies, be sure to follow their guidance on keeping students separated by section. For example, if you use Hypothesis for social annotation or Pronto for messaging, be sure you understand how sections work in these tools: