3C Media Solutions App
3C Media Solutions allows faculty to create a free account for uploading, storing, captioning, and sharing instructor-created videos. By using the 3C Media app, you can embed your videos in Canvas.
Before you begin using the app (or the accompanying 3C Media web site), there is some important information you need to know:
- 3C Media prioritizes the captioning of asynchronous videos for instructors to those who have students with a documented Academic Accommodation Plan (AAP) through each college's DSPS office. All other requests are given the lowest priority. Priorities are set forth in this State Chancellor's Office memo.
-
If you have an AAP need that meets the requirements of the above memo, email support@ccctechconnect.org. You will receive a response prompting you to supply the information needed to process your request. For this method, your video will first be auto-captioned, then any mistakes will be corrected by a human being.
-
If you complete the form within the app, your video will only be auto-captioned, and you will be responsible for correcting any mistakes. Learn how to edit your captions.
Setting Up an Account
The instructions below show you how to register a new account using the integration tools within Canvas.
- Open the Canvas course in which you want to add a video.
- In the course navigation, click the Settings link.
- At the top of the page, click the Navigation tab.
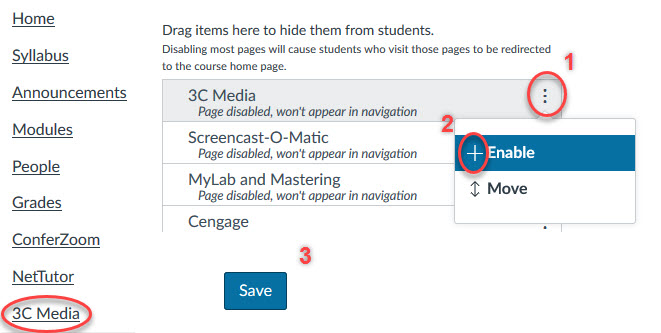
Scroll down to locate 3C Media and click on the three dots (1), then click +Enable (2). Remember to click Save (3), and now 3C Media will be in your course navigation menu.
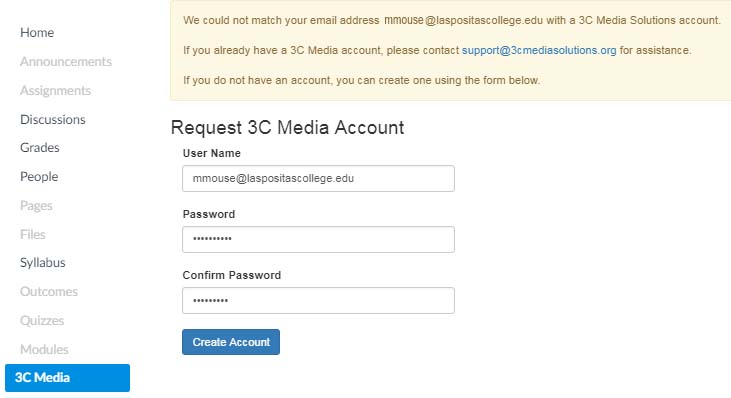
Click the new 3C Media link in your course navigation. A window opens with instructions.
You should see your LPC email address:
NOTE:
- The email must stay/be your laspositascollege.edu email account (not Gmail or any other type of email.)
- The password must be the same password you use when logging into Canvas, and click Create Account.
 Uploading Videos
In the new window that appears, click on "Add some now" to upload your video.
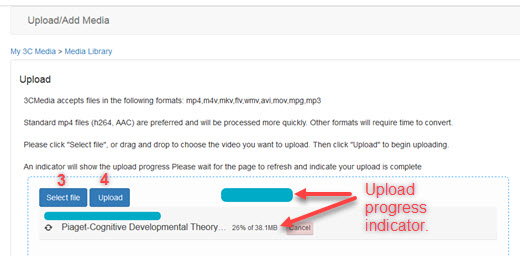
Click Add/Upload (1), click on Upload Media (2), and a new window pops up. Click Select file (3). Once you have found and selected your video file, click Upload (4). You can view the progress of the upload.

Captioning Videos
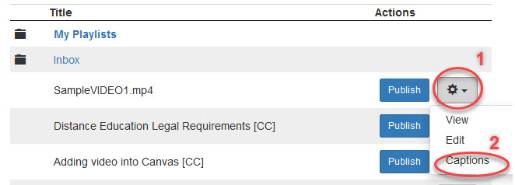
Once a video has completed uploading, you can request captioning by clicking on the Gear Icon (1) to the right of the title, and select Captions (2). Proceed to fill out the request form...keeping in mind the provisions set forth at the beginning of this page.
You can still insert the video into your course at this time (do not click Publish yet). The automated captioning will sync automatically to the video once it is processed. Remember to edit your captions to ensure accuracy.
Note: Only use the Publish Button if you want the students to access your list of videos via the 3C Media link in the course navigation. The best practice is to follow the instructions below to add the videos into a Module, Page, Assignment Discussion or Quiz.
Adding Videos into a Course
Videos uploaded to 3C Media can be added into a course via the Rich Content Editor using the External Tool link or as a direct link in a Module.
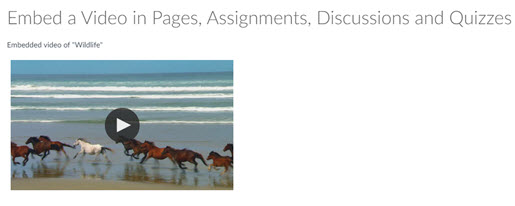
Embedded Video
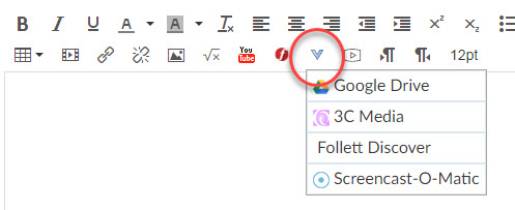
To Embed a video , click on the External Tools icon in the Rich Content Editor, and select 3C Media.
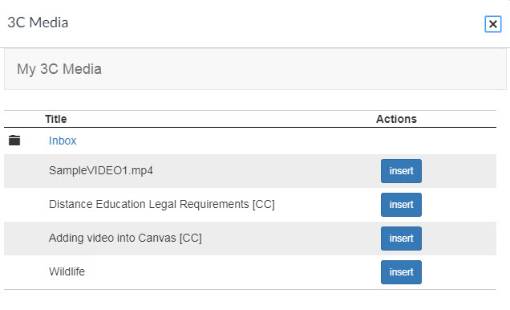
 A window pops up with a list of your video uploaded to 3C Media. Click the Insert
button of the video you want. Click Save.
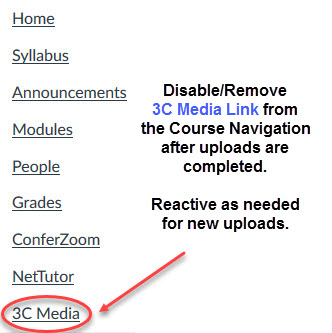 Disable/Remove the 3C Media link from your course navigation. Students will not need
this link, they will access the videos where you have embedded them. This link is
only neccessary for instructors when uploading new video files. Even with this link
disabled all your uploaded videos are still listed when using the External Tool in
the Rich Content Editor.
For more detailed information, follow these instructions from 3C Media Solutions.

